Wednesday, 25 November 2015

Ancho Cherry Chocolate Cookies


It's cold and frosty outside, and the furnace decided to stop working today...while waiting for the furnace to be repaired, I made some cookies. I knew the heat from the oven would warm the house, and it would help to pass the time. Now the house is warm and toasty, and smells wonderful.

As far as what kind of cookies to make, I found a small piece of dark chocolate and some dried cherries. I made a variation of one of my favourite cookies, which is double chocolate and cranberry. Dried ancho chili powder and cinnamon gave a kick to the cookies, the dried cherries added a chewiness.

These cookies are soft and gooey, and if you eat them while they are still warm the soft chocolate adds a lovely, sweet messy element to them!


Measure the dry ingredients into a bowl:

2 1/4 cups flour
1/2 cup cocoa
1 teaspoon baking soda
1/2 teaspoon cinnamon
1/8 teaspoon ground dried ancho chili

Set aside until needed.


Cream:

1 cup butter
1 cup brown sugar
3/4 cup white sugar


Add:

2 eggs
1 teaspoon vanilla extract
1/2 teaspoon almond extract

Add the eggs one at a time, scraping the bowl down in between additions.


Add the dry ingredients, and mix on low speed until almost combined.


Add:

1/2 cup chocolate chunks
1/2 cup chocolate chips
3/4 cup dried cherries, roughly chopped

Continue to mix on a low speed until everything is combined.


Turn the oven on to heat up to 350F. Line 2 cookie sheets with parchment paper.


Portion the cookie dough into balls and place them onto the cookie sheets, spacing them about 1" apart. Gently press them down slightly, as these cookies do not spread a lot during cooking.


Bake until the cookies are set, but still soft in the centre, about 14 - 16 minutes.


Allow the cookies to cool for 10 minutes on the tray, before serving.


  • Not only did I warm the house up by using the oven to bake these cookies, but I also cleaned out some of the bits and pieces in my baking cupboard. The dried cherries leftover from baking brownies, the small chunk of chocolate and the last few chocolate chips in the bag.
  • I chopped the chunk of chocolate into chunks and combined it with the chocolate chips to give a total of 1 cup of chocolate. You can use all chocolate chunks or chips if you like. You can also use any type of chocolate; I do think that dark chocolate ids the best complement to cherries.
  • As I mentioned, I usually make these cookies using dried cranberries. Experiment with other dried fruit such as dried figs or mango.
  • The addition of chopped nuts would add a crunch to the cookies...I wanted to add toasted almonds, only to find I had none. I used almond extract instead. Nuts that work well with cherries are almonds, hazelnuts or pecans. Any type of nut can be used.
  • Other additions that you might want to consider are toffee bits, chopped caramels, crushed candy canes, candies such as M & Ms or chopped peanut butter cups. This can be a good opportunity to use up that Hallowe'en candy....
  • Orange or lemon zest can be substituted for the almond extract.
  • The spices are optional, and can be omitted. They can also be changed to other spices such as ground or fresh ginger; aniseed or start anise; cayenne pepper or chipotle chili.
  • Espresso powder or instant coffee can be used to make a mocha cookie. I would leave out the cherries in this case, and add more chocolate and nuts.
  • To make 'regular' chocolate chip cookies, omit the cocoa and use 2 3/4 cup of flour. The dried fruit can still be included.
  • To make chocolate peanut butter cookies, use 1/2 cup butter and 1/2 cup peanut butter. Add chopped peanuts to the dough if you only have smooth peanut butter.
  • The cookie dough can be made a couple of days ahead and kept refrigerated. if you want to freeze the cookie dough, portion it into balls before freezing. This allows you to defrost and bake as many cookies as you need, and still have more for another time. The cookies can also be frozen after they have been baked.

Sunday, 22 November 2015

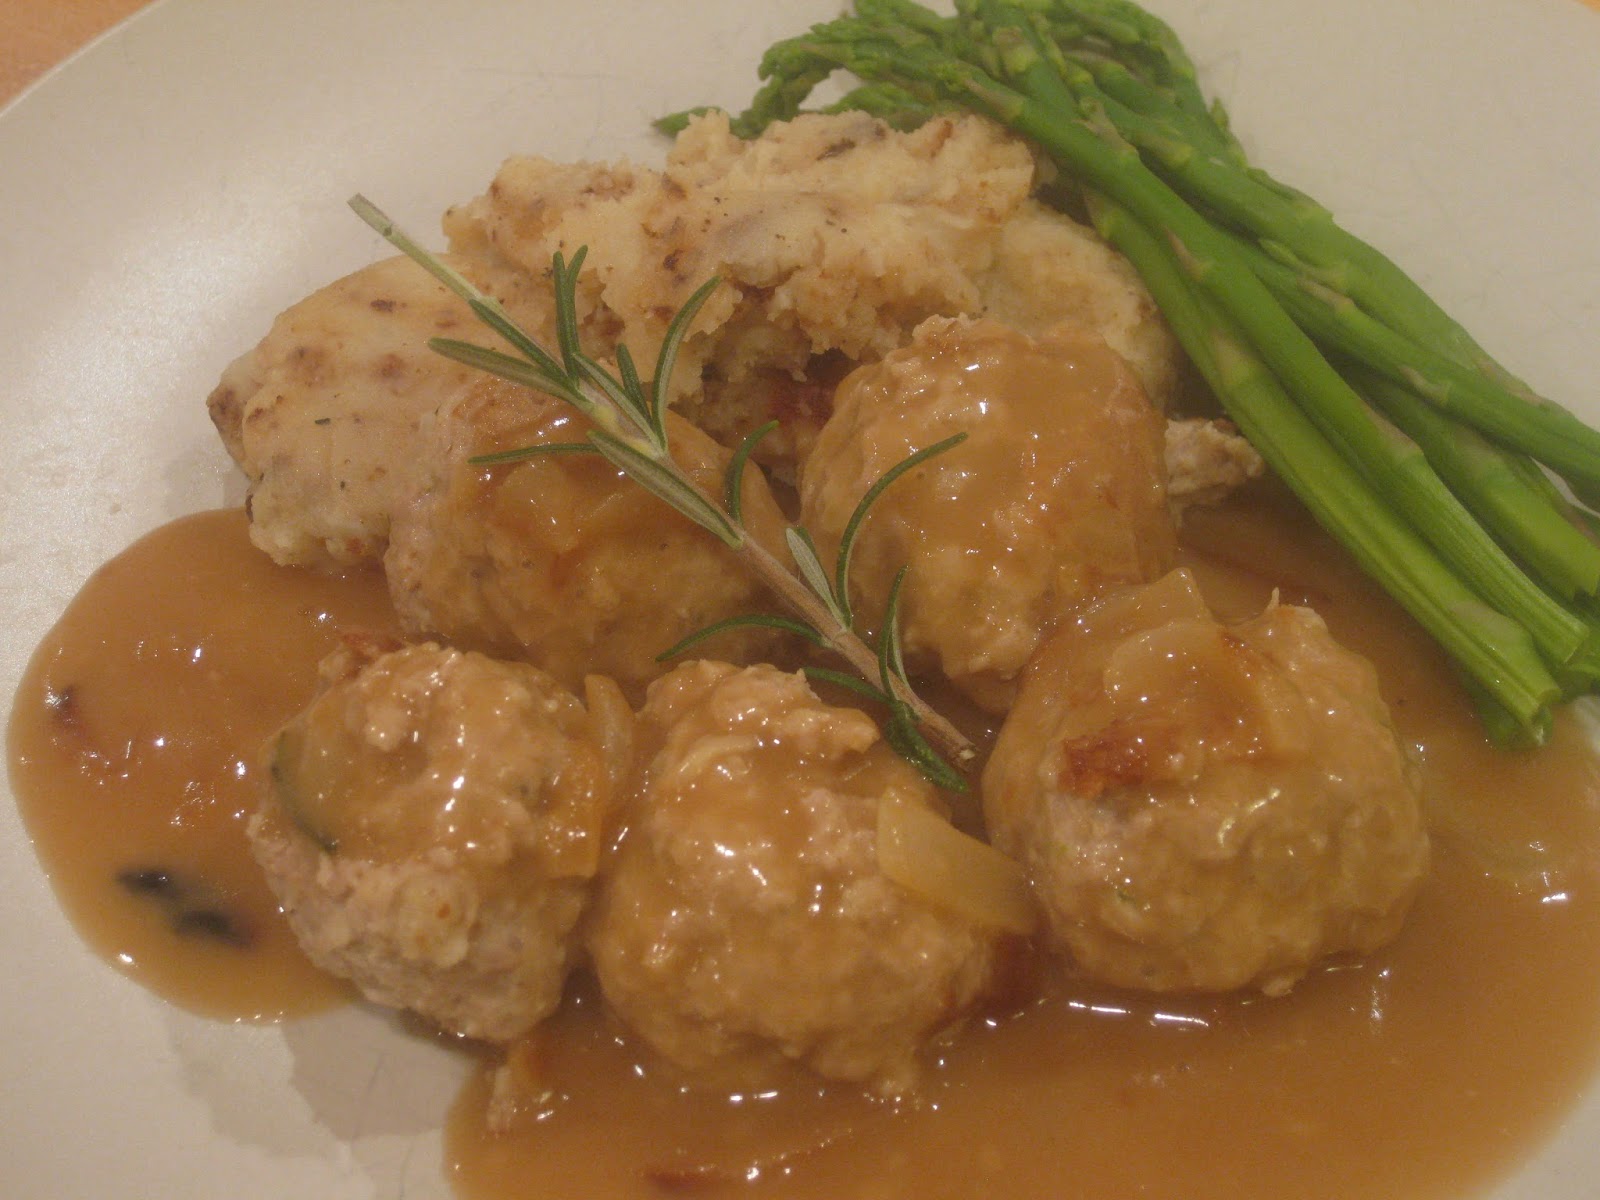
Braised Turkey Meatballs with Balsamic Onion Gravy


There was one and a half pounds of ground turkey thighs in the fridge that needed to be used. It had been defrosted a couple of days ago and I never got around to using it as I had worked late both days.Time to use the turkey!

Last time I used chicken stock I had frozen the unused portion, so I used that to braise the meatballs, and then make a tasty gravy, with caramelized onions and the last bit of balsamic vinegar.

The whole meal turned out better than I had hoped it would...tender, juicy meatballs and a silky gravy that were both full of flavour. I served them with some leftover mashed potato and steamed asparagus, and was very happy with all the praise I received for the yummy dinner!


To start the meatballs, combine:

1/3 cup minced onion
3 cloves garlic, minced
1 egg
1 teaspoon minced fresh rosemary
A few drops of hot sauce
1/4 teaspoon salt
1/4 teaspoon ground black pepper


Stir in:

3/4 cup fresh breadcrumbs
2 teaspoons Dijon mustard


Using your hands, knead in:

1 1/2 pounds ground turkey thighs


Roll the mixture into meatballs. I made 27 that were about 1 1/2" diameter.

Wrap with plastic wrap and place in the refrigerator for a couple of hours.


To start the gravy, caramelize in a bit of olive oil:

1 medium onion, sliced

When the onion is soft and golden in colour, add a small sprig of fresh rosemary. Turn off the heat and set aside until later.


Heat a deep sided frying pan that is large enough to hold all of your meatballs in one layer. Add enough olive oil to lightly coat the bottom of the pan.

Add the meatballs, and brown them on the first side and then turn them to start browning the second side. Keep the heat at medium high.


Turn the heat down to low, and add enough chicken stock to almost cover the meatballs.

Cover and simmer until the meatballs are completely cooked.


To finish off the gravy, remove the sprig of rosemary. Turn the heat back on to low, and add:

1 tablespoon butter

When the butter has melted, stir in enough flour to coat the onions. Cook, stirring for a couple of minutes.


When the meatballs are cooked, remove them from the heat.

Carefully pour the braising liquid into the gravy pan, whisking as you do so to avoid lumps.

Add the liquid gradually, until the gravy is smooth and silky. Taste and adjust seasoning.


Stir in:

1 tablespoon Balsamic vinegar.


Serve the meatballs with the gravy, and pass the remaining gravy at the table.


  • If you don't have fresh breadcrumbs on hand, simply crumble a slice or two of bread between your fingers.
  • I keep a container in the freezer for stale bread and crusts. When it is full, I defrost the bread and turn it into breadcrumbs by putting the bread into the food processor. I return the breadcrumbs to the freezer; this way no bread gets wasted and I always have breadcrumbs on hand.
  • Fresh herbs add a lot of flavour to the meatballs. This is the first time I have used rosemary, and it was a good choice with the turkey. I usually use basil, oregano or parsley.
  • Refrigerating the meatballs for a couple of hours allows them to firm up, and also allows the breadcrumbs to absorb any extra moisture. This keeps the meatballs firmer and less likely to break apart during cooking.
  • It is important that the meatballs only simmer when the chicken stock has been added. Rapid boiling can cause them to fall apart. The meatballs can also be braised, covered, in the oven if you prefer.
  • Water can be used as part of the liquid. Wine can also be used. The chicken stock helps to retain moisture, and the meatballs add flavour to the stock, which in turn adds a lot of flavour to the gravy.
  • The meatballs can be made with any ground meat, or combination of ground meats. Chicken or vegetable stock can be used for pork; beef stock is best for beef, lamb or veal.
  • When making the gravy, add extra chicken stock or milk if you feel that the gravy is too thick after adding all of the braising liquid.
  • I chose not to strain the gravy, as the onions added a lot of sweetness. It can be strained if you prefer a smooth gravy.
  • Sliced mushrooms can be cooked along with the onions. Shallots can be used instead of onions.
  • The Balsamic vinegar adds depth to the gravy; a hint of acidity as well as sweetness. It can be omitted if you like. Maple syrup can be used instead, to add more sweetness to the gravy. If you have a spicy pepper jelly, add some of that to the gravy.
  • The meatballs can be made and frozen; defrost or cook from frozen.
  • Leftover meatballs make great sandwhiches; slice them and use for pizza toppings. Make smaller meatballs and serve them as a canape, accompanied by a dipping sauce.


Monday, 16 November 2015

Orange and Hoisin Glazed Chicken Legs


This tasty chicken dish came about because the bag of oranges I had bought were not the best for eating...the membranes between the flesh were quite tough. There was a lot of juice, sweetness and flavour to them though, and there were only 4 left. I wanted to do something other than just drink the juice from these last oranges, so I combined it with the last of my hoisin sauce to make a sweet, citrus marinade.

The sugars in both caramelized during the cooking, glazing the chicken legs, while combining with the pan juices to make a sauce. The meat was tender and moist, the skin was crispy...hard to believe it was so easy to make.


To make the marinade, combine in a resealable plastic bag:

Juice of 4 oranges
1/4 cup hoisin sauce
1 tablespoon soy sauce
3 green onions, thinly sliced
2 cloves garlic, minced
1 teaspoon minced fresh ginger


Add the chicken legs to the bag, and seal, squeezing out as much air as possible. You will need:

5 bone in, skin on, chicken legs


Leave the chicken in the refrigerator overnight, or for at least 6 hours before cooking it. This will allow the marinade to tenderize, and the flavours time to penetrate, the meat. Turn the oven on to 350F.


Place the chicken legs into an ovenproof dish.

Pour the marinade over the chicken

Place into the oven to bake.


Every 20 minutes, remove the dish from the oven and baste the chicken with the marinade and juices that are in the bottom of the dish. The second time you do this, drain most of the liquid from the dish, saving it for future basting. This allows the skin to start crisping up.


 Continue to baste the chicken, and drain any excess liquid from the dish until the chicken is fully cooked.

Allow the chicken to rest for 5 minutes before serving.

Skim the fat from the top of the reserved pan juices, and discard it. Bring the pan juices to a boil, allowing them to reduce down for your sauce.


Sprinkle the chicken legs with toasted sesame seeds to serve. I served the chicken legs with basmati rice, garlic broccoli and Asian slaw. The sauce can be passed separately, or drizzled over the chicken and rice.


  • Add the zest from one of the oranges to increase the intensity of the orange flavour in your marinade. 
  • If you are not juicing oranges, but using purchased juice, you will need about 3/4 cup of juice for this recipe.
  • A combination of any citrus can be used...orange, lemon, lime, grapefruit.
  • To increase the glaze, honey can also be added to the marinade. I would only add 1 - 2 teaspoons, as both the orange and hoisin are sweet. If you are using lemon or lime juice, you can add extra honey.
  • The small amount of soy sauce adds enough salt; more can be added at the table as needed. The saltiness increases as the marinade reduces, both in the oven and in the pot when making the sauce.
  • I use tamari instead of regular soy sauce. Tamari is usually gluten free, as it is made without wheat. Always double check the labels to be sure if you are on a gluten free diet. I use tamari because I find the flavour to be richer, denser and more complex, as well as less salty than regular soy sauce. The choice is yours, use whichever you prefer.
  • The chicken can be grilled, basting every 10 minutes to maintain moistness and add flavour.
  • This recipe can be used to roast whole chickens, chicken wings or drumsticks. The cooking time will need to be adjusted accordingly. 
  • The marinade can also be used for pork tenderloin, or for basting salmon while baking or grilling.
  • If you prefer a thicker sauce than just reduced pan juices, mix 1 teaspoon of cornstarch with orange juice to make a runny paste and whisk this into the boiling sauce just before serving. Add half to begin with, and if you would like the sauce a bit thicker, then add the rest.
  • The leftover meat was removed from the bones, and used to  make wraps for lunch. It can also be used for things like rice or noodle bowls; chicken salad; added to a salad.

Tuesday, 10 November 2015

Beef and Cheddar Pies


We had braised beef for dinner a few nights ago, and the leftovers were destined for the freezer, until it occurred to me to use them to make a pie filling. The beef had been braised in caramelized onions and beef stock, a take on French onion soup. The simplicity of this base allowed me to use a variety of vegetables in the pies.

To make the pastry I used the last of the cream cheese, along with butter as the fat. I added some cheddar cheese to the filling before covering it with the pastry.

At the last minute I decided to make the pies individual, cooking and adding the last three mushrooms to some of the pies (we are not all mushroom lovers!)

Make the pastry first, so that it has enough time to rest before being rolled out. Make the filling while the pastry rests; if you can allow enough time for the filling to cool before assembling the pies, that is even better.


In the bowl of a stand mixer, using the paddle attachment, mix to combine:

3 ounces cream cheese
11 ounces butter


Add:

1/4 teaspoon salt
2 cups flour


Mix on low speed until a dough starts to form.


Place the dough onto a lightly floured counter, and gently knead just enough to form a ball.


Divide into 2 equal pieces, form each into a disc and wrap well in plastic wrap.

Place in the refrigerator to rest.


Using a bit of olive oil, cook the vegetables until they start to soften and colour slightly:

1 medium onion, diced
1 celery stalk, diced
2 carrots, diced
2" piece of zucchini, diced
2 cloves garlic, minced
1 teaspoon fresh thyme, chopped
salt and pepper to taste


Add enough flour to coat all of the vegetables well.

Cook, stirring for 2 - 3 minutes.


Add beef stock. The leftover braised beef had liquid with it, so I added:

1/2 cup beef stock

Cook, stirring, until the mixture starts to boil, and you have a thick sauce coating the vegetables.


Add:

2 cups shredded braised beef, along with any liquid

Bring the filling to a boil, and add more beef stock if necessary. Taste and adjust seasoning.


Stir in:

2/3 cup frozen peas


Turn the oven on to heat up to 400F.


Divide the filling between 5 individual  ovenproof dishes.

Top each one with sliced cheddar cheese.


Divide one of the pastry discs into 5 pieces, roll each out to 1/8" - 1/4" thickness.

Cut out a piece slightly larger than the dish.


Top each dish with a piece of pastry. Decorate the edges, and cut slits in the centre to allow steam to escape.

Brush the pastry with egg wash.


Place the pies on a baking sheet, and bake until the filling is bubbling, and the pastry is crisp and golden. This took about 30 minutes. Allow the pies to cool slightly before serving, as the filling will be incredibly hot, and you don't want any burnt mouths at your table!


  • This pastry is very forgiving, and harder to overwork, which is one less thing to worry about. The cream cheese adds richness, creaminess and flakiness. The amount of cream cheese can be doubled, just reduce the amount of butter so that the total amount of cream cheese and butter remains 14 ounces. Spreadable or brick cream cheese can be used.
  • The butter should be cold but not hard, and you want to mix it with the cream cheese until they are just combined, not light and fluffy. If your butter is salted, omit the salt...together with the salt in the cheese there will be more than enough for your dough.
  • Add flavour to the pastry by adding chili flakes or ground black pepper, spices such as cumin, cinnamon or nutmeg, chopped fresh herbs or grated Parmesan.
  • The dough can be frozen, or kept in the refrigerator for 2 - 3 days. 
  • Use this pastry recipe for making sweet or savoury pies, quiche or canapes.
  • When making the meat filling I used only a small amount of beef stock initially, adjusting it after adding the leftover braised beef and liquid. You are looking for a thick gravy consistency.
  • The pie can be made as one large pie, with only a top crust, or with a double crust if that is what you prefer.
  • The choice of cheese (or no cheese) is personal. Blue cheese would also be a good choice with the beef, so would a smoked cheese.
  • As I mentioned, I cooked some sliced mushrooms and added those to some of the pies. Other vegetables that can be added included cooked chopped spinach or kale, potato or sweet potato, red peppers, rutabagas.
  • If you do not have cooked beef use ground beef, adding it to the vegetables once they have started to colour. Continue to cook until the beef is no longer pink, and then continue with the recipe, adding the flour and stock.
  • Other leftover cooked meat can be used, just use an appropriate liquid...chicken stock, vegetable stock or milk. Other liquids such as red or white wine and beer can be used as part of the liquid as well.
  • Leftover turkey from Thanksgiving or Christmas, roast chicken or pork, even fish can be used instead of beef. Use herbs and spices that will work with your meat...sage, rosemary or thyme with turkey or chicken; dill and lemon with fish.

Thursday, 5 November 2015

Seared Ahi Tuna with Avocado and Crunchy Vegetable Salad


I had a half pound Ahi tuna steak to feed two people...and lots of fresh, crispy vegetables to use. There was some Asian vinaigrette (see the post Mango and Tamarind Glazed Pork Tenderloin with Asian Slaw for the recipe) in the fridge that needed to be used up.

The vinaigrette became the base of the meal...I used it to marinade the tuna, to dress the vegetables for the salad, and to coat the diced cooked tuna and avocado. The richness of the tuna and avocado were offset by the fresh, crisp vegetables and baby spinach leaves. The smooth, silky texture was contrasted nicely by the crunch of the vegetables. The dressing tied it all together.

First, make the dressing if you need to. Wash some baby spinach leaves, and set aside.


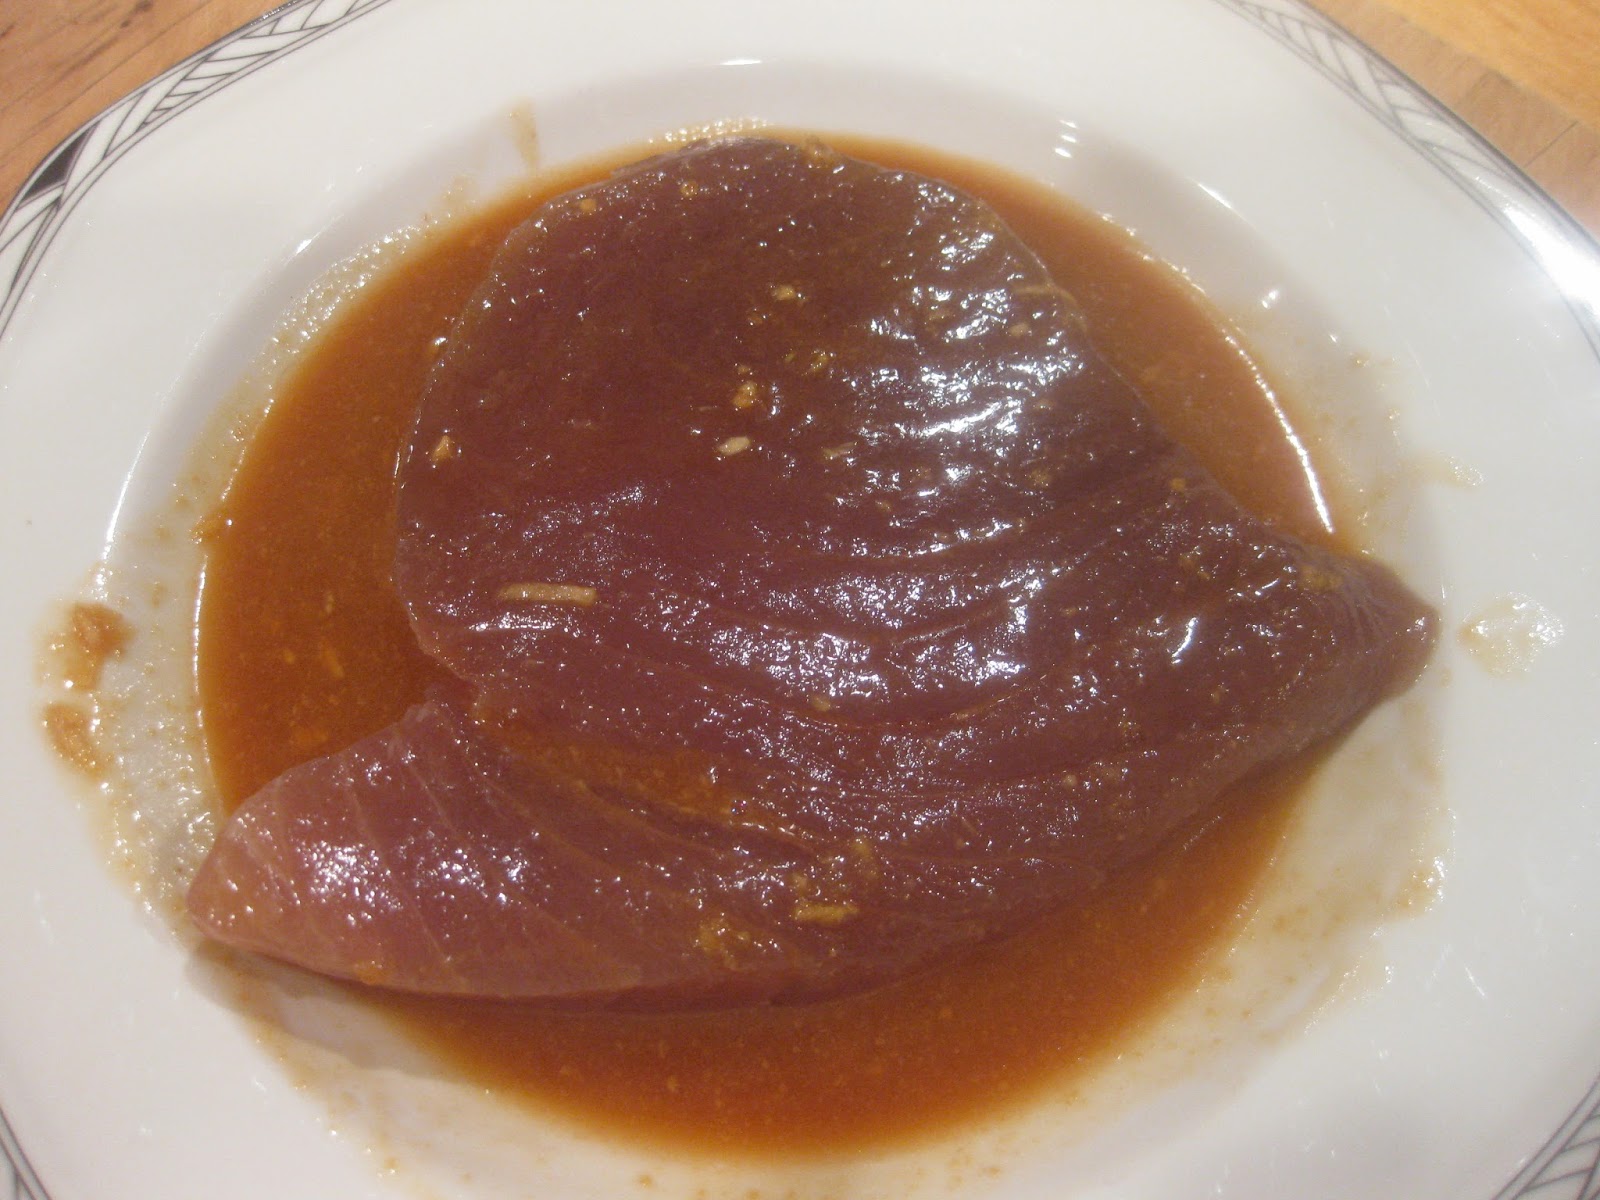
Pour some of the vinaigrette over the tuna steak, and leave it to marinate while you prepare the rest of the salad ingredients.


In a bowl, combine the vegetables with enough of the Asian vinaigrette to coat them:

3/4 cup thinly sliced cucumber
1/2 red pepper, thinly sliced
2 green onions, sliced
3/4 cup fresh green beans, cut into 1/2" pieces


On each plate, place:

A large handful of baby spinach leaves
4 grape tomatoes, halved


In a smoking hot pan, sear the tuna, turning once. No oil is needed; there is sufficient oil in the vinaigrette.

This does not take long, about  45 - 60 seconds per side. My steak was just over 1/2" thick.

Remove the tuna from the pan and allow it to rest for 5 minutes.


Thinly slice the tuna, and then cut the strips again to end up with diced tuna.


Combine the diced tuna with:

1/2 avocado, peeled and diced
2 teaspoons lightly toasted sesame seeds
1 - 2 tablespoons of vinaigrette


Divide the chopped vegetables between the 2 plates, placing them on top of the spinach.


Divide the tuna and avocado between the two plates. I placed 3 small mounds around the edge oif the plate. You can sprinkle extra sesame seeds over the top before serving if you like.


  • Any Asian style dressing can be used; the combination of garlic, ginger, sesame oil and soy sauce work extremely well with Ahi tuna. Use your favourite recipe, or a store bought dressing if you like. My dressing has a small amount of peanut butter in it, which adds a bit of creaminess.
  • I chose not to dress the spinach leaves as I felt there was more than enough dressing on everything else.
  • The tuna can be left sliced and placed on top of the salad. You can also cook individual steaks and place a whole steak on each plate.
  • Fresh tuna should be cooked rare; if cooked longer it becomes dry, tough and unpalatable. When you are cooking it, watch the sides of the steak and you will see the colour change as the fish cooks. As soon as a thin line appears on the bottom, turn the fish over and cook it until the other side is the same. There will be a definite line of unchanged colour in the middle. The trick is to cook the fish at a high temperature for a short time.
  • When slicing the cooked fish, cut against the grain of the flesh, as you would with any meat. 
  • Other fish can be used for this salad...salmon, marlin, swordfish, scallops or prawns. The fish can be pan seared or grilled.
  • Don't limit yourself to fish. Chicken, pork or beef will work too.
  • The vegetables you use in the salad are completely up to you. I used crunchy vegetables. The important thing to remember is that they should be cut small, as this makes the salad easier to eat. Some suggestions are shredded carrots, bean sprouts, corn, snap peas or snow peas.
  • Greens on the bottom are optional. This could be turned into a rice or noodle bowl. Simply cook (or heat leftover) rice or noodles,  add some vinaigrette while still warm and then proceed with the recipe.
  • Make the tuna and avocado, add finely chopped green onions or fresh chives and serve as an appetizer, passing rice crackers or crispy wonton wrappers to top with the salad.
  • The tuna and avocado can also be turned into a passed canape by serving a small amount on porcelain Chinese soup spoons (the ones that have a flat bottom), or on thinly sliced pieces of cucumber.

Wednesday, 4 November 2015

Balsamic Honey Glazed Chicken Thighs


When I started to make these chicken thighs all I knew was that I wanted to use Balsamic vinegar; after some thought I combined it with honey and olive oil to create a glaze for the chicken.

Baking the chicken in the vinegar and honey allowed the flavours to be fully absorbed into the chicken, and as it reduced it became a glaze for the outside of the chicken. Balsamic vinegar has an element of sweetness that comes out when it is reduced, and the honey intensified this, but the acidity of the vinegar stopped it from becoming too sweet.

For the simplicity of the recipe it delivered huge flavour, and family members were fighting over who was going to take the leftovers to work the next day!

 Pre-heat the oven to 375F.


In a small saucepan, heat:

1/4 cup Balsamic vinegar
1 - 2 tablespoons honey
1 tablespoon olive oil
salt and pepper to taste


In a very hot pan, using a drizzle of olive oil, sear:

12 boneless, skinless chicken thighs


When the second side of the chicken is seared, pour the balsamic glaze over the top.

Place the pan directly into the oven to finish cooking the chicken.


Bake until the chicken is fully cooked, starting to fall apart and the vinegar and honey have reduced to a syrupy consistency.

Remove the pan from the oven and place it on the stovetop again, spooning the glaze over the chicken.


I served the chicken with roasted potato wedges and steamed green beans.


  • If you use bone in chicken thighs, which take longer to cook, you can achieve more of a glaze on the meat. 
  • The recipe calls for 1 - 2 tablespoon of honey. Start by using 1 tablespoon, and add more if you feel it is needed. Balsamic vinegars are all different in sweetness and acidity levels depending on how long the vinegar was aged.
  • I think that next time I might add a sprig or two of fresh thyme to the glaze, for another layer of flavour.
  • Other vinegar can be used if you have no Balsamic vinegar, but be aware that the acidity levels of other vinegars are often higher, so adjust the honey accordingly, or add some fruit juice to counteract the acidity.
  • A sauce can be made using the pan that the chicken was baked in. Remove the cooked chicken and set it aside, keeping it warm. Add chicken stock to the pan and reduce it, whisking to incorporate all the flavour that is in the pan. You can serve it as is, or whisk some cold butter in to create a butter sauce. If you are partial to gravy, then make a gravy in the pan...it will absorb all of the flavours from the honey and vinegar.
  • This glaze can be used when cooking chicken breasts, pork tenderloin or ribs. If you are grilling, baste the meat often so that a glaze forms on the outside of the meat.