Saturday 27 February 2016

Beef Bourguignon


Beef bourguignon is a classic French stew, using red wine for the majority of the liquid, and beef stock for the rest. Originating in the Burgundy region of France, the wine that is used is typically a Burgundy red...this is not a hard and fast rule, especially if you are making this as a way to use up left over red wine, which is what I was doing.

The classic vegetables are onions, garlic and mushrooms, with the addition of pearl onions near the end of cooking. I added my last few carrots and bit of zucchini, because they were there to use.

I had no pearl onions, so I just used yellow onions.

This stew is cooked low and slow, to allow the meat to cook until it is fork tender. It is a perfect dish for using cheaper, tougher cuts of beef.


Cut your beef into 1" chunks. I used:

2 pounds inside round

Season the meat with salt and pepper, and sear in a hot pan, using a bit of olive oil.

When the meat is seared on all sides, remove it and set aside until needed.


Dice:

3 rashers of bacon

Cook the bacon in the same pot that was used to sear the beef. Stir often to prevent sticking and burning.


When the bacon is starting to crisp, add the vegetables:

3 carrots, diced
1 large onion, diced
1/2 zucchini, diced
6 - 8 button mushrooms, quartered

Season with salt and pepper and cook until the vegetables are starting to soften slightly.


Stir in:

1/4 cup tomato paste

Cook for 2 minutes.


Add:

1/4 cup flour

Cook, stirring to coat all of the vegetables, for 2 - 3 minutes.


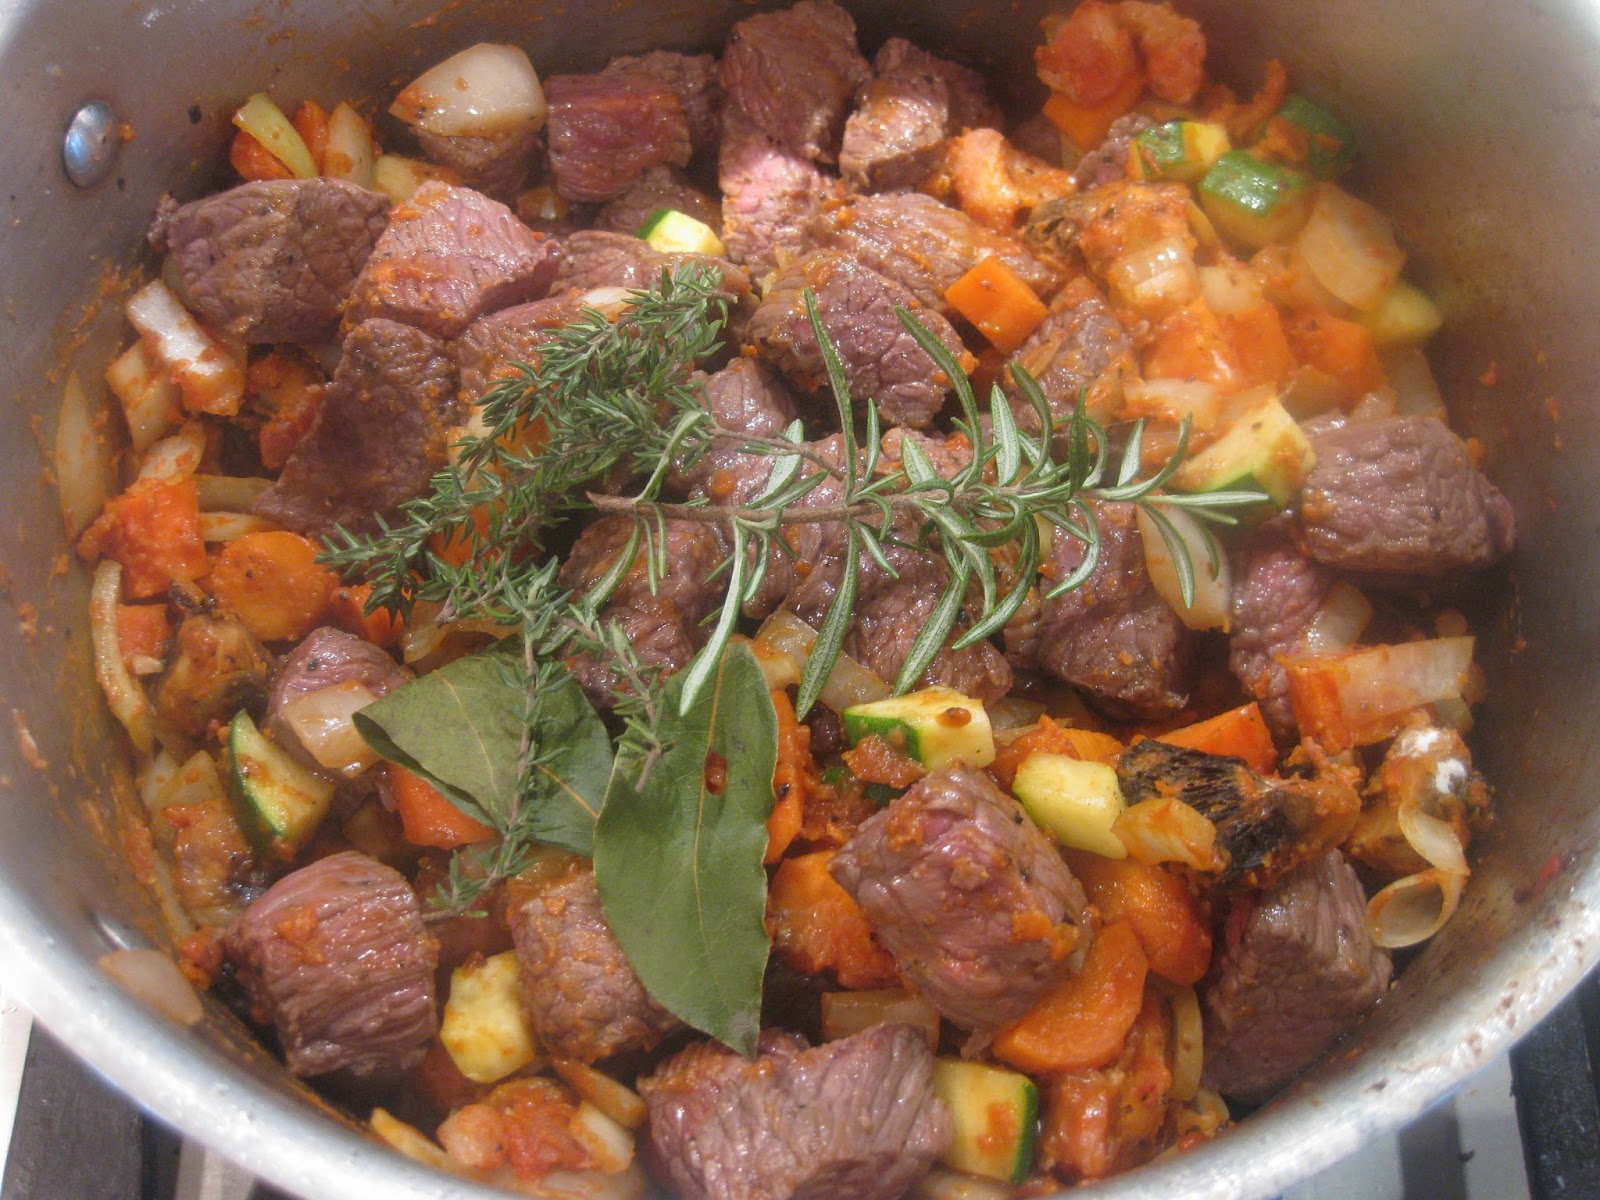
Return the meat to the pot, along with:

1 1/2 cups red wine
2 bayleaves
a sprig of fresh rosemary
2 sprigs of fresh thyme

Bring to a boil, stirring.


When the wine starts to boil, add enough beef stock to cover the meat and vegetables. Bring to a boil, stirring.

Cover and simmer until the meat is tender; 3 - 4 hours.


Remove the bayleaves and herb stems from the stew. Taste and adjust seasoning. Serve, accompanied by warm, crusty bread to dip into the delicious gravy.


  • Cooking the stew long and slow allows tougher cuts of meat to become tender, and because tougher cuts are often cheaper this is a great way to save money. Try using cuts such as bottom round, chuck roast, shoulder roast, top round.
  • The meat can be cooked on the stove top, covered and simmered, which is what I did. It can also be cooked in the oven at 350F, or in a slow cooker. The key being to cook it for a long time at a low setting in order to effectively break down the connective tissues in the meat and give you the tender pieces you want.
  • Quickly searing the meat seals in the flavour. It also adds a layer of caramelization to the meat, which in turn adds a lot of flavour, depth and a bit of sweetness to the stew.
  • The classic recipe for beef bourguignon calls for you to use a whole bottle of wine. I never do that; instead I use up leftover red wine. We are white wine drinkers, but occasionally buy red wine to make things like Braised Chicken Thighs with Capers, Raisins and Shallots  or beef bourguignon. 
  • If you do not have beef stock, or do not have enough to cover the meat and vegetables completely, use water.
  • Pearl onions are a classical garnish for this stew. If you are not able to buy them peeled and frozen, you will need to peel the fresh onions. The best way to do this is to quickly blanch them in boiling water, then using a sharp knife cut off the root end of the onion and gently squeeze it out of the skin. If you do not want to use pearl onions, just use yellow onions as I did.
  • By adding the extra vegetables in the form of carrots and zucchini the basic flavour of the stew was not changed. In fact, the carrots added a bit of sweetness.
  • The bacon adds saltiness, so I always season lightly at each step of the cooking process...browning the meat, cooking the vegetables...and then adjust the seasoning at the end.
  • The stew can be made 2 - 3 days ahead of time; the flavour intensifies over time. It can also be frozen, cooked or uncooked (cut all the ingredients and freeze in a large re-sealable bag, with the meat and bacon in a separate small bag; all of the prep is done, which saves a lot of time).
  • A benefit to making the stew the day before is the fact that when it cools the fat rises to the top, and once it has been chilled this fat layer sets and is easy to remove from the stew.
  • Add less flour, or more liquid and cut the meat into smaller pieces and you can easily turn this into a soup.
  • The gravy is the best part of this meal, in my opinion, so make sure to serve it with bread, dumplings or noodles to help soak up all that yummy goodness.

Thursday 25 February 2016

Panzanella


This simple and tasty salad is a great way to use up old bread. It is, as my daughter put it, "a salad of croutons and tomatoes"...but it is so much more than that. The bread is crispy on the outside and soft on the inside, the tomatoes are sweet and juicy, and their juice combines with the oil and vinegar to soak into the bread.

I like to toast the bread in the oven, along with herbs, spices, garlic and Parmesan to add even more flavour. The amount of crispiness depends on your personal preferences; so does the amount of dressing you add and the amount of time you allow the bread to sit and soak it up.

I used up a couple of two day old small round crusty loaves to make the salad. I had just bought some baby heirloom tomatoes, so I had a lot of different colours and shapes to work with.

Start off by heating the oven to 350F and cubing your bread into 1" cubes. I had approximately 4 cups of bread cubes.


Toss the bread with:

peeled garlic cloves
salt and pepper
crushed fennel seeds
olive oil

Spread onto a baking sheet and bake until the bread is starting to crisp up on the outside, but is still soft on the inside.


Sprinkle a handful of grated Parmesan over the bread and place back into the oven.

When the bread has reached the desired crunchiness, remove from the oven and allow to cool completely.


In a large bowl, combine:

2 cups halved grape tomatoes
A handful of grated Parmesan
Salt and pepper to taste


Add:

1/4 cup Balsamic vinegar
1/4 cup olive oil

Allow the tomatoes to sit with the oil and vinegar for about 30 minutes; this will help to draw out some of the tomato juices.


Add the cooled bread to the tomatoes, along with:

2 tablespoons chopped fresh basil

Stir to combine; taste and adjust seasoning. If you feel the bread needs more oil and vinegar, add more.


Serve the salad immediately if you prefer the bread to remain slightly crispy; let it sit a while if you want the bread to absorb more liquid and become a bit softer.


  • Using up old bread doesn't have to mean making just breadcrumbs or bread pudding...this salad turns it into a tasty salad, full of colour, flavour and texture. The bread can be toasted with the herbs, spices, garlic and Parmesan and used as croutons in a green salad or as a soup garnish.
  • Keeping in mind that the bread cubes will crisp up as they cool, remove them from the oven when they are still a bit softer than you would prefer. The ideal for the salad is crunchy on the outside, but still soft on the inside. A more traditional way of making the salad is to soak the stale bread in liquid, and then squeeze out the excess before adding the other ingredients. I prefer to crisp the bread as it adds more interest to the salad.
  • Adding garlic, herbs, spices and cheese to the bread during toasting adds interest to the salad, and complements the flavours of the dressing. Woody herbs such as rosemary and thyme work well; try spices such as chili flakes, cayenne pepper, paprika or garlic powder.
  • If you are able to use heirloom or yellow, orange and red tomatoes you will have the bonus of different shapes, colours and flavours. Roma, grape, cherry or any type of ripe tomatoes that you have available will work well in the salad. Cut them in half, quarters, slices or a combination for interest. The key is that the tomatoes are ripe and juicy.
  • Allowing the cut tomatoes to sit with the salt and vinegar allows the juices to be released, and combine with the oil and vinegar. This dressing soaks into the bread and gives it another boost of flavour.
  • Any vinegar can be used...Balsamic, herb vinegars or wine vinegars.
  • Herbs that can be added along with the tomatoes include basil, parsley, tarragon (use this sparingly as it in a strong herb and can easily overpower other flavours). Green onions or chopped fresh chives can be added as well.
  • For added interest include other ingredients such as olives, chopped sundried tomatoes, artichoke hearts, anchovies - whole or minced, roasted red peppers.
  • The amount of oil and vinegar is a starting point, and should be adjusted according to how crispy the bread is, as well as how much you want the bread to absorb. The longer the bread sits with the dressing and tomatoes, the more liquid it will absorb, so keep this in mind when combining them before serving the salad. I let my salad sit for about 20 minutes, as I wanted the bread to remain slightly crunchy.
  • This salad does not keep well once the bread has been added to the tomatoes.


Wednesday 17 February 2016

Macadamia Nut Banana Bread


The number of overripe bananas in the freezer was growing and it was time to use some of them. I wanted to make something other than just plain old banana bread; a closer look in the cupboard and I found some macadamia nuts and rum...

Start off by greasing two 8" X 5" loaf pans, and turning the oven on to 350F to heat up.


In a small saucepan, combine:

2 ounces butter
1/3 cup brown sugar


Heat slowly until the butter is melted and the sugar dissolved, whisking to combine the two.

Bring the caramel to a boil.


When it starts to boil, whisk in:

1 teaspoon vanilla
1/2 teaspoon cinnamon
1 1/2 tablespoons rum

Remove from the heat.


Divide the caramel between the two prepared pans, and sprinkle with macadamia nut halves.

Set aside while you make the banana bread batter.


Cream together:

4 ounces soft butter
1 cup white sugar


Add, one at a time:

2 eggs
1 teaspoon vanilla


Add in:

1 cup mashed ripe bananas

Mix until just combined.


Sift together the dry ingredients:

2 cups flour
1 teaspoon baking soda
1 teaspoon baking powder

Add 1/3 of the dry ingredients to the batter, and mix until just combined.


Mix in:
 
1/2 cup plain Greek yoghurt


Add the remaining dry ingredients in two additions, alternating with another 1/2 cup of Greek yoghurt.


Divide the batter between the two pans, carefully spreading it over the caramel and macadamia nuts.

Place the pans into the oven and bake until a wooden skewer comes out clean, about 40 - 45 minutes.


Immediately run a knife between the loaf and the pan, and invert onto a cooling rack.


Allow the loaves to cool slightly before cutting...


  • Bananas that are too ripe and soft for eating can be frozen if you are not using them right away. They can be frozen in the skin, nice and easy. Defrost, then cut them open and the flesh will slip out of the skin, ready to use. The other option is to mash them, and freeze them in containers; pre-measuring the fruit before freezing makes defrosting the right amount for your recipe easy.
  • Another way to use ripe bananas is to slice and freeze them to use in smoothies instead of ice.
  • As with any recipe using nuts, the type you choose is up to you. Nuts that work well with bananas include pecans, peanuts or almonds. Whole nuts are best for this recipe. If your nuts are chopped or ground, fold them into the batter before baking.
  • Another option if you are using ground nuts is to add them to a basic crumble and spriunkle it on top of the batter before baking. A basic crumble recipe is 1/4 cup each of flour, brown sugar and oats mixed with 1 - 2 ounces of butter until crumbly. Nuts, coconut and spices such as cinnamon, ground ginger or nutmeg can be added as well.
  • The rum can be omitted from the caramel. It can also be replaced with orange juice, brandy or liqueur.
  • I used plain Greek yoghurt as I had no sour cream; sour cream will add richness to the loaf.
  • This banana bread is best served at room temperature or warmed up. It will last a couple of days, well wrapped. It can also be frozen.

Wednesday 10 February 2016

Whiskey Butter Basted Chicken Breast with Orzo and Arugula


The idea of using the whiskey to baste meat while cooking has been in my mind for a while, and I decided to try it out with these chicken breasts. It was so simple, but the taste and tenderness of the chicken was out of this world! I love it when something so easy gives such great results...everyone thinks I spent hours making the meal...

I chose to accompany the chicken with warm orzo and arugula. This allowed me to use the arugula I had bought and not yet used. Folding it into the hot orzo wilted it, and I added in the last handful of grape tomatoes to make a very satisfying side dish.

Steamed green beans and a quick crumble of goat cheese and dinner was ready!

While the chicken is cooking, bring a large pot of lightly salted water to a boil and cook 1 1/2 cups of orzo. Drain and return to the pan when it is done.


In a heavy bottomed pan that is large enough to hold your chicken breasts, melt:

2 tablespoons butter
1 tablespoon olive oil
1/4 teaspoon pepper
1/4 teaspoon salt


When the butter starts to bubble, add:

4 boneless, skinless chicken breasts

Place the chicken skin side down, and keep the heat at a medium high temperature.


When the first side of the chicken is seared, turn the breasts over.

Add:

1/4 cup whiskey


Turn the heat to medium low and cook the chicken, turning often, as well as basting with the whiskey and pan juices, until it is fully cooked.

The liquid will slowly reduce and glaze the chicken as it cooks.

Remove the chicken from the pan, and allow it to rest in a warm place, loosely covered.

Keeping the heat on, add to the pan:

1 handful of grape tomatoes, halved
2 green onions, thinly sliced
2 cloves garlic, minced

Season with salt and pepper, and cook quickly, shaking the pan to move them around until the tomatoes start to colour and the skin blisters slightly.


Immediately scrape the tomatoes, onions and garlic into the pot of cooked orzo.

Reserve the pan to make a quick sauce for the chicken.


Turn the heat on, and add:

1/2 cup chicken stock

Bring to a boil, scraping the bottom of the pan to remove all the browned bits (they have all the flavour).

Allow the stock to reduce down by half while you finish off the orzo.


To finish off the orzo, add:

a handful of grated Parmesan
1 tablespoon chopped fresh basil

Gently stir this into the orzo, taste and adjust the seasoning.


Fold:

2 large handfuls of washed baby arugula into the orzo.


To serve, place some orzo and arugula onto the plate, and top with steamed fresh green beans and a bit of crumbled goat cheese. Drizzle the reduced chicken stock over the chicken breast...this simple sauce has all the flavours of everything that was cooked in the pan...whiskey, chicken, tomatoes, green onions and garlic.


  • The simplicity of this dish is hidden by the tenderness, moistness and amount of flavour in the chicken. By searing the vegetables in the same pan, you tie the two items together nicely.
  • You can use all butter or olive oil if you choose. I used both as I wanted the richness of the butter, but if not watched carefully it can burn. Adding a bit of olive oil to the butter reduces the chances of burning the butter.
  • If you have a prepared flavoured butter, this can also be used.
  • Whiskey was my choice because I am slowly working my way through the bottle that we have, which no one drinks! Any liquor can be used...wine, bourbon, rum.
  • The orzo can be served hot, or can be made ahead and served as a cold salad, which is what happened with the leftovers...lunch the next day.
  • Other greens can be substituted for the baby arugula. Try regular sized arugula (shredded or torn), spinach, shredded Brussels sprouts, beet greens.
  • The basting method can be used with pork chops, or pork tenderloin. It also works well with fish such as salmon, cod or scallops.
  • By basting, or frequently turning the chicken, the meat is kept moist, and as the liquid reduces it creates a glaze on the outside of the meat. If the liquid is reducing too quickly, you can either add more, turn the heat down or cover the pan for a while.

Thursday 4 February 2016

Spinach Salad Nicoise


Salad Nicoise is a composed salad, which basically means that the various ingredients are arranged on the plate as opposed to all being tossed together.

This is usually not the way I prefer to make salad, but I do love this salad; I love the different colours and textures.


I did forget to buy olives, which is one of the traditional ingredients, and I chose to add some avocado as I had a couple of nice perfectly ripe ones to use.

The addition of spinach is also my choice, as I had a nice big bag of it, washed and ready to use.


As for everything else, there were two hard boiled eggs in the fridge (I keep them on hand for snacks), two red potatoes, some green beans and a beautiful, ripe red tomato. All I needed was the tuna, which I was lucky enough to find for a reasonable price...dinner for three people under $20, and a whole lots of things used up. What could be better?


Make the dressing by whisking  together:

2 tablespoons lemon juice
2 teaspoons Dijon mustard
1 teaspoon chopped fresh thyme
1/3 cup olive oil

Season to taste and adjust the acidity by adding more lemon juice or a bit of honey.


Cut 2 large red potatoes into wedges, and cook in lightly salted boiling water until just tender.

Drain, and cool for a few minutes. Gently toss with a bit of dressing, just enough to coat the potatoes and set them aside to cool.


Prepare the rest of the ingredients for the salad:

Peel 2 hardboiled eggs, and cut into wedges
Trim and blanch green beans, running under cold water to stop them from overcooking
Cut tomato wedges
Wash spinach leaves


Marinate the tuna steaks in a bit of the dressing for 10 - 15 minutes.

I had 2 steaks, each about 3/4" thick for a total weight of 12 ounces.


Heat a non-stick pan until it is very hot.

Place the tuna steaks into the pan and allow the first side to sear.

When you can see the colour change on the side of the steak, as shown, turn the steak to sear the second side.

The steaks cook really quickly, about 1 1/2 - 2 minutes per side, depending on the thickness.

The dark stripe in the middle indicates that the tuna is cooked rare, as it should be.


Remove the tuna from the heat, and allow it to rest while you prepare the salad.


Lightly toss the spinach and blanched green beans in some of the remaining dressing.


Start to assemble the salads on the plates.

Place spinach and green beans in the centre and the potatoes, tomatoes and eggs around the outside.


Thinly slice the tuna, cutting across the grain.

Lay the slices on top of the spinach.


Place a few thin slices of avocado on top of the tuna.

Drizzle the remaining dressing over the potatoes, tomatoes and egg.

  • The dressing is quite acidic; to cut the acidity add honey, more oil or use some vinegar instead of all lemon juice. I like the intensity of the dressing as it is. When it is absorbed by the potato and tossed with the greens the effect of the lemon juice is lessened. 
  • The key to the potatoes is to gently toss them with some of the dressing while they are still warm. This way the dressing is absorbed by the potatoes, and penetrates the flesh instead of just coating the outside.
  • The way I hardboil my eggs is to place them into a pot and cover them with cold water. Bring it to a gentle boil and time it for 10 minutes. Immediately run under cold water until the eggs are cold enough to hold and peel. 
  • Another method of boiling eggs is to place them into a pot and cover with cold water. Bring it to a boil, turn off the heat, cover and leave for 15 - 30 minutes. As the water cools, the eggs continue to cook.
  • Grape or cherry tomatoes, whole or halved can be used, as can yellow, orange or heirloom tomatoes in all their beautiful colours.
  • Make sure the green beans are blanched for no more than 30 seconds, to avoid overcooking them. Running them under cold water will stop the cooking process, leaving you with crisp beans.
  • I used washed baby spinach. Mixed greens can also be used. The greens can also be omitted.
  • Traditionally black Nicoise olives are also included; so are anchovies. I really like anchovies, but not a lot of people do. A few ways to include them are to add mashed anchovies to the dressing; mash them with softened butter and black pepper and spread onto sliced baguette, baking to make crostini to serve with the salad; soak the anchovies in a bit of milk to remove some of the salt, and then dredge them in flour and shallow fry until crispy.
  • Marinating the tuna in the dressing keeps the flavour profile consistent throughout the salad. The lemon juice also starts the cooking process by starting to break down the meat.
  • Fresh tuna is best served rare; if overcooked it will become very dry and unpalatable. The dark stripe that you see on the side of the steak once  both sides are seared lets you know that it is not overcooked. If that stripe disappears then your tuna could be dry inside.
  • The salad can be made with other fish, or meat such as chicken breast or pork tenderloin. Technically it won't be a salad Nicoise, but it will still be a colourful, tasty salad, perfect for lunch or dinner.