Monday, 27 November 2017

Apple Crumble Shortbread


A perfect Fall snack or dessert, these squares used up my three apples, the handful of pecans (I seem to go through these very quickly) and the half pound of butter in the fridge. Sweet, crunchy, nutty crumble covering a layer of thinly sliced apples and cinnamon, all on top of a brown sugar pecan shortbread crust.

We had last minute dinner guests, so added some ice cream and we had dessert. Leftovers have been eaten with coffee today!

To begin with, in an 8" square pan, make and bake the pecan crust from the post Millionaires Bar with Rum Ganache and Pecan Shortbread Crust.

While the crust is baking, prepare the apples, and the crumble topping.


In the food processor used for grinding the pecans and flour for the crust, combine:

2/3 cup flour
2/3 cup brown sugar
1/4 cup chopped pecans
3 ounces butter, cubed


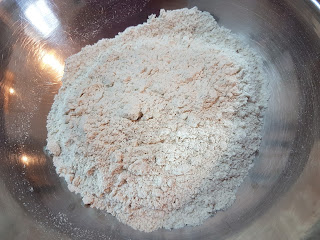
Process until you have a crumbly mixture that will form clumps if gently pressed together.

Set aside until needed.


Peel, core and thinly slice:

3 apples


Toss the apples with:

1 teaspoon cinnamon
1/2 teaspoon vanilla
1 - 2 tablespoons sugar


Add in:

2 tablespoons cornstarch

Toss gently to combine.


When the pecan crust is baked and out of the oven, gently and evenly spread the apples over the crust.


Spread the crumble over the apples.


Place the pan into the oven, at 350F, and bake until the apple filling starts to bubble, and the crumble is crisp and golden, about 40 - 45 minutes.


Remove from the oven and allow to cool completely before lifting the foil out of the pan, and cutting the shortbread into squares or bars. It can be eaten at room temperature, or warmed up again. Serve with ice cream, whipped cream or as is.


  • As with nuts in most recipes, they can be exchanged for other nuts; I wanted to use hazelnuts but was outvoted! Nuts that pair well with apples include hazelnuts, almonds and walnuts.
  • I used Gala apples, and they were quite sweet, so I used a slightly heaped tablespoon of sugar in my filling. If you have a more tart apple, such as Granny Smith, consider adding the extra tablespoon of sugar.
  • The apples can be sliced on a mandoline, or the slicer side of a box grater (which is what I did). 
  • Pears can be substituted for apples.
  • Oats can be added to the crumble.

Tuesday, 14 November 2017

Breakfast Nachos


Breakfast nachos? Think of this as a cross between nachos and heuvos rancheros. An excellent brunch dish, this can also be served for a casual Sunday night supper. I must say, that when my oldest daughter said that she was making breakfast nachos I was a little bit skeptical. When I saw her photos I was sold!

This is my version; it has been in the back of my mind for a while. I was trying to think of something to make that would allow me to use up my ripe avocado, and realised that there were perfect bits and pieces in the fridge to make this meal.

I found some cooked andouille sausage, some cooked corn, half a red pepper, half a large red onion, 3 green onions, my tortillas and of course the avocado.

I made my own tortilla chips, as I wanted to use the open bag of tortillas...I also did not feel like heading out to the store for one thing!


Cut into small triangles:

4 x 10" flour tortillas.

Toss with olive oil, salt, pepper and ground cumin. Spread in a single layer on baking sheets and place in a 350F oven to bake.


Bake until the tortilla chips are golden and crisp. They bake quickly, so keep an eye on them.

Mine took about 5 - 8 minutes.

Remove from the oven and leave to cool completely.


In a hot pan, cook (or place the cooked sausage):

1 andouille sausage, skin removed
1/4 large red onion, minced

Cook over a medium heat until the onion starts to soften.


Add:

3/4 cup corn kernels
1/2 sweet red pepper, diced

Cook until the corn starts to caramelize and the pepper is soft.

Taste and adjust seasoning.


When you are ready to serve the nachos, heat the oven to 350F.  You can build the nachos on individual plates or on a large sharing plate. I did individual plates.


Put down a layer of tortilla chips, and sprinkle with grated cheese. I used a combination of cheddar and smoked white cheddar.


Add some of the cooked sausage mixture.

Repeat the layering until you have used all the tortilla chips and sausage.

Place into a 350F oven to heat everything, and to melt the cheese.


Now is the time to cook your eggs. I made scrambled eggs, using the 3 green onions that I had. Undercook the eggs slightly, as they will be going under the broiler.


Divide the egg between the nachos, and sprinkle a last bit of cheese on top.

Place under the broiler just long enough to melt the cheese.


Serve immediately. Do not forget to put the very hot plate on top of another cold one! I added some chopped avocado, tossed with the juice from half a lime, and passed salsa at the table. Dig in and enjoy!


  • Firstly, store bought tortilla chips can be used....I would have used them, but as I mentioned I did not want to go to the store just for that. That being said, these are a good substitute; the cumin adds a nice flavour, and they are quick and easy to make.
  • These being breakfast nachos, breakfast sausage would be ideal. You can cook them whole and then chop them up, or you can remove them from the skin and crumble the meat as it cooks. You could also use any other favourite sausage.
  • If you have olives, or jalapenos, throw some of those into the layers.
  • I think that softly poached eggs would also work well; you would have the runny yolk to dip your chips into. The consensus when I made this was for scrambled eggs. I cooked two eggs per person.
  • Sprinkle the finished nachos with some fresh chopped tomato and cilantro.
  • This works nicely as a brunch item as the chips and sausage mixture can be made the day ahead. Assemble, heat and then add the eggs and eat!

Saturday, 11 November 2017

Millionaires Bar with Rum Ganache and Pecan Shortbread Crust


Millionaires Bars are one thing I love to eat, and who wouldn't? Shortbread, caramel and chocolate...my idea of heaven! For some reason, however, I have never made them. I was given a reason to this weekend as my husband has been asking for them fairly often, since seeing a picture of them online.

He helped me to put a shelf up, if I promised to make the bars, so here we go...

When I went to the pantry to get the brown sugar, I saw the very few pecans that were sitting there and made a decision to use them in the bars. I ended up using them in the shortbread crust, which gave a lovely rich, nutty flavour to the base.

Believe it or not, I also had exactly enough butter left to make these. Some things are meant to be...

Oh, and as I was making the ganache I had a request to add rum, which I did.

These bars were a perfect combination of nutty, crisp and buttery shortbread topped with a sweet caramel and finished off with a creamy, rum infused dark chocolate ganache. I think I know why I've never made them before....the temptation to have yet another one has been with me ever since the first bite!


To begin, line an 8" square baking pan with foil and lightly grease the sides to prevent the caramel layer from sticking.

Turn the oven on to 350F.


To make the crust, combine the following in a food processor:

1 cup + 2 tablespoons flour
1/4 cup brown sugar
1/4 cup pecans halves


Process until the nuts are finely ground.

Empty into a bowl.


Mix in until the dough starts to form clumps:

4 ounces melted butter
1/2 teaspoon vanilla


Press the pecan shortbread evenly onto the bottom of the prepared pan.

Bake until the crust is fully baked, and the edges are starting to colour, 18 - 20 minutes.

Remove from the oven and allow the crust to cool completely.


To make the caramel filling, combine the following in a heavy bottomed saucepan:

1 can condensed milk
2 tablespoons light corn syrup
60g brown sugar
125g butter


Cook over a low heat, stirring constantly until the butter has melted and the sugar is dissolved. It is important to stir this the whole time as it can scorch very easily because of the high amount of sugar in the condensed milk. It is worth the effort though!


When the sugar is dissolved and the butter is melted increase the heat to medium high and continue to cook and stir.

The caramel will start to darken and thicken as it cooks. Mine took between 15 - 18 minutes to reach the right consistency: thick enough that if you drag the spatula through the mixture it is slow to come back together.


Immediately scrape the caramel out of the pan and onto the cooled base, using the spatula or a spoon to spread it evenly.

DO NOT TOUCH THE CARAMEL - IT IS VERY HOT AND WILL BURN YOU!!!

Place the pan into the fridge until the caramel has cooled completely.


To make the ganache, place all the ingredients into a heat proof bowl:

5 ounces dark chocolate, finely chopped
4 tablespoons whipping cream
2 tablespoons dark rum


Place the bowl on top of a pot of simmering water, and allow the chocolate to melt slowly, stirring until you have a smooth, silky ganache.

Using a towel, remove the bowl from the pot, drying the bottom as you do so.


Pour the ganache over the cooled caramel and tilt the pan, allowing it to spread evenly.

Return the bars to the fridge and leave until the ganache has set, at least a couple of hours.


To serve, carefully lift the foil out of the pan, and gently peel the foil away from the sides of the bar. Using a sharp knife, cut into bars or squares.


  • Nuts or no nuts in the crust: it is completely up to you. If you choose no nuts, increase the amount of flour by 2 tablespoons. If you choose nuts, any type of nut can be used; be sure to measure the nuts whole / pieces not ground.
  • White sugar can be used instead of brown for both the crust and the caramel.
  • Coconut can be added to the crust instead of nuts for a tropical flavour; orange zest would also be a nice addition.
  • You can use purchased caramel or dulce de leche for the caramel filling to save time.
  • The caramel can be flavoured with the addition of instant coffee granules or espresso powder; vanilla; orange zest.
  • Toast and roughly chop some pecans and fold them into the caramel before pouring it onto the crust.
  • To make the ganache without the rum, simply use whipping cream instead of rum. Other liqueurs can be used if you wish. 
  • For a different presentation, swirl the ganache over the caramel, leaving some of it exposed.


Thursday, 9 November 2017

Dukkah Crusted Chicken Breast


I was given some Dukkah to try, and the first time we had it, with olive oil and warm pita bread we were hooked. I also knew right away that I wanted to use it as a crust for chicken breasts at some point; I soon realised that I needed to do this sooner rather than later as my husband was snacking on it more often than I realised.

By the time I made this, there was just enough left to coat two chicken breasts. This chicken was so tasty....spicy, crunchy, moist, juicy and tender. I had a lemon that was half zested, so used the remaining zest and some of the juice to marinade the chicken before cooking it.

I served it with couscous, adding the last few sundried tomatoes, some fresh basil and feta cheese to it.

I now have to either buy more Dukkah, or make some myself! It is an Egyptian blend of herbs, spices and nuts...often hazelnuts, sesame seeds, cumin, coriander and pepper but can vary depending on who makes it. It is spicy, tangy and crunchy and well worth a try if you haven't had it.


To add flavour, and to help the Dukkah stick to the chicken, marinade the chicken in:

Juice and zest of half a lemon
2 tablespoons olive oil

I used:

2  boneless, skinless chicken breasts


Cover and refrigerate the chicken for 2 - 4 hours. Turn the oven on to heat to 350F.


Combine:

1/3 cup Dukkah
1 1/2 tablespoons flour


Remove the chicken breasts from the marinade, shaking any excess liquid off the meat.

Coat the chicken in the Dukkah and flour mixture, pressing to make sure that all sides are well covered.


In a pan that can be placed into the oven, heat some olive oil. When the oil is hot, add the chicken breasts, and sear both sides.


When the chicken has been seared on both sides, put the pan into the oven to finish cooking the chicken.

When it is fully cooked, remove the chicken from the oven and leave it to rest for 5 - 10 minutes before serving.


I served my chicken sliced, on top of steamed green beans and coucous that had feta cheese, basil and sundried tomatoes added to it. Fresh lemon juice can be squeezed over the chicken just before serving.


  • Note that I did not use salt to season this dish...I knew that the Dukkah I was using had enough salt in it, and adding more would be too much. Always adjust your salt to the ingredients you are using.
  • I put the Dukkah and flour into the food processor briefly, as some of the hazelnuts were still quite large, and I wanted a more uniform size for the crust. 
  • If you don't want to wait for the chicken to marinade (which is more for flavour than tenderizing in this instance), rub the chicken breast with some olive oil to help the Dukkah stick.
  • Make extra of this yummy chicken and use it for sandwhiches, wraps or pizza toppings. If you have leftover couscous, combine the two for a salad...perfect for lunch.
  • Use Dukkah for coating fish or pork; in soups or stews; to season vegetables or just as a dip with olive oil and bread.

Tuesday, 7 November 2017

Fish Stew with Roasted Tomato and Fennel Broth


Fish, tomato, fennel and basil...they were meant to be together, and so they were in this hearty fish stew. Not quite cioppino or bouillabaisse, my version has some similarities in the tomato and fennel.

I was aiming to use half a fennel bulb, some red wine and fresh basil, and chose to use fish as I was going to be in the area of the local fish shop. I picked up some halibut, scallops and prawns to use; at the last minute choosing to pan fry the halibut and serve it on top of the broth, while cooking the scallops and prawns in the broth.

This allowed me to add another level of flavour to the halibut, by rubbing it with the zest left on a partially zested lemon before cooking it. My original plan had been to cut it into chunks and to cook it in the broth along with the scallops and prawns, which is the more traditional approach.


Drain, reserving the juice:

1 X 28 ounce can of tomatoes

Place into an ovenproof dish, along with salt, pepper and olive oil.

Bake at 350F until the tomatoes start to colour. Remove from the oven and set aside.


To make the broth, cook in olive oil:

1/2 red onion, thinly sliced
1/2 fennel bulb, thinly sliced

Season with salt and pepper, and cook until soft and starting to caramelize.


Add:

4 cloves garlic, minced
2 tablespoons tomato paste

Cook, stirring, for 2 minutes.


Add:

1/2 cup red wine

Cook until the wine has almost completely reduced.


Add:

the roasted tomatoes
3 sprigs of fresh thyme


Stir in:

the reserved tomato juice and an equal amount of chicken stock

Bring to a boil and then turn the heat down and simmer until the onion and fennel are tender.


Taste and adjust seasoning. Add sugar if the broth is too acidic for your taste. I added 1 tablespoon of sugar.


Prepare the fish:

Peel the prawns, leaving the tails on
Clean the scallops, removing the side muscle
Remove the skin from the halibut


On a plate, combine:

Zest of half a lemon
1/4 teaspoon salt
1/4 teaspoon ground black pepper
1 tablespoon olive oil

Rub this on both sides of the halibut.


Cook the halibut in a hot pan, until fully cooked.


While the fish is cooking, add the prawns and scallops to the broth and simmer until they are cooked.


To serve, divide the broth between 2 large bowls, sharing the prawns and scallops evenly. Top each bowl with a cooked piece of halibut, and sprinkle with chopped fresh basil.


  • As I had chicken stock open, that is what I used. Vegetable stock, fish stock, or clam juice are all good choices for a dish like this. The chicken stock does not stand out flavour wise, so don't feel that you have to buy something else if that is all you have.
  • Tomato juice can be acidic, depending on the brand you are using, which is why I tasted and adjusted it after cooking it for a while.
  • White wine can also be used; I had red wine open. You can also use liqueur such as Pernod, which will increase the anise flavour that the fennel brings to the dish.
  • Any fish you add, whether it is halibut, cod, snapper or salmon can be cut into large chunks and cooked in the broth along with the prawns and scallops. The other alternative is to do what I did and pan fry it as a large piece and serve it on top of the broth.
  • If you are able to buy fresh clams and / or mussels, steaming them open in the broth will add the flavour of their juices to the broth. They also look really good in the bowl. Just remember to provide a plate at the table for the empty shells .
  • Crab or lobster meat can be added as well.
  • The stew is great served with crusty bread that can be used to mop up the broth.
  • The broth can be made ahead and frozen; defrost, reheat and proceed with cooking the fish.